Art Deco Vanity part 2
- HalfPastFourDesign

- Mar 6, 2020
- 4 min read
Replacing decorative trim, sanding and priming - prep work still sucks
If you read my last blog post I explained the initial prep work on this vanity. The next step is replacing the missing trim work with mold putty and casting resin, sanding the top smooth and priming everything.
It's like magic
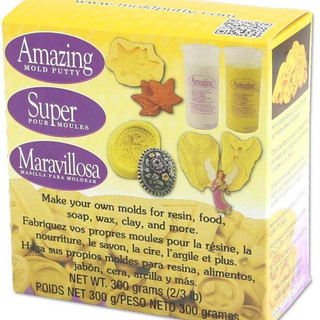
There are some amazing products on the market these days that really make a difference in furniture repair and refinishing. This mold putty and casting resin are two of those products.
It's really easy to use and detailed directions are in the boxes. The mold putty comes in two separate containers, one is yellow and one is white. You basically take out the amount you think you will need from each container and knead them together for a few minutes. It begins to harden after a few minutes so you do need to work on the quicker side (don't do it if there is a possibility you might be interrupted in the next five minutes by a pot boiling over on the stove the one day you actually decided to cook). Now roll the putty into a shape that will cover the good trim piece you are duplicating and push it gently but firmly over the trim and leave it for around 10 minutes or so (consult the directions for specifics). Do this process for each piece of trim work you need.
When those have successfully hardened, gently peel them off and lay them face up. You will now mix up the resin to pour into these molds. The resin comes with two bottles of liquid, one is yellow and one is white, and measuring cups. You will need a small disposable cup to mix the liquids in. You will measure out equal parts of each liquid and pour them into the disposable cup mixing well. You will need to work on the quicker side again with this process because the liquid starts to solidify. Again, consult the directions that come in the box for specifics. Pour this mixture into the molds you made, filling them to the top but not over flowing.
The photo below shows the pieces of trim I made after they were removed from their molds. The next step is attaching them to the furniture. Get your wood glue now.

Let's get started:
1. Remove any of the tiny nails that held the trim in place and put them in a container or baggie so you can find them again. You will need them for the next step.

2. Make sure the areas where you will attach the trim pieces are smooth and clean. Apply a good wood glue to the back of the trim and put it in place. Get yourself a cute little hammer and hammer those tiny nails back in. Use something heavy to hold everything in place while it dries. In an instance like this where clamps can't fit into awkward spots I will use several heavy books to hold everything until dry, usually overnight, but that may be overkill (consult the directions on the bottle for best results). The best books to use are heavy and are found in the dark corners of antique stores and old book shops. Seek them out, they are treasures.
3. Sand and prime the top. This top is pretty darn damaged from years of use. The sisters that shared this vanity growing up really gave her a good workout. I can tell by looking at those stains and dings that no matter how much I sand and strip that top it will never look great. Those stains look like they probably go all the way down into the base layer. That's OK because the look I am going for on this old gal will need a painted top.
A light to moderate sanding will smooth out dings and scratches and the primer will help even them out and prepare the surface for the paint.
I will use a clear primer because I want the wood color to show through when I distress and not see a white primer.


Let's not forget the most beautiful mirror that goes with this vanity. It is in surprisingly excellent shape so we only need to prime it.
The next steps will be the fun part, finally. In the next blog I will talk about the paint and the technique I used and how to get the hardware looking great again.
To get future blog posts delivered to your email be sure to sign up on my email list before you leave. I won't sell your info to anyone and I won't spam you, but you may be the first to see new items before they post anywhere else and any special offers I might have.
Thanks for joining me, and as always let me know if you have any questions.
Monica


Comments